


On the websites of some businesses and companies, you’ll find a privacy policy page in which the individual or company states how they collect, store and process the personal information of their users (e.g. name, address, email, sex, and so on).
The privacy policy page also clarifies whether that information is kept confidential or can shared be shared with third parties (along with the circumstances for that).
Read on to learn how to add a privacy policy page to your WordPress website. You’ll need to have a WordPress installation on your local machine or a web host to follow this guide.
Before we start: Affiliate marketing is currently one of the easiest ways to make money online. To get started, check out the 72IG WhatsApp income generator training which teaches you how to make money doing Affiliate Marketing. Check out the course here.
Check if You Already Have a Privacy Policy Page
If you’re running WordPress 5.9 or a higher version, a privacy policy page should already be set up for you by default. This might hold true in other versions along 5.x.
Here’s how you can check for it:
Log in to your WordPress admin dashboard
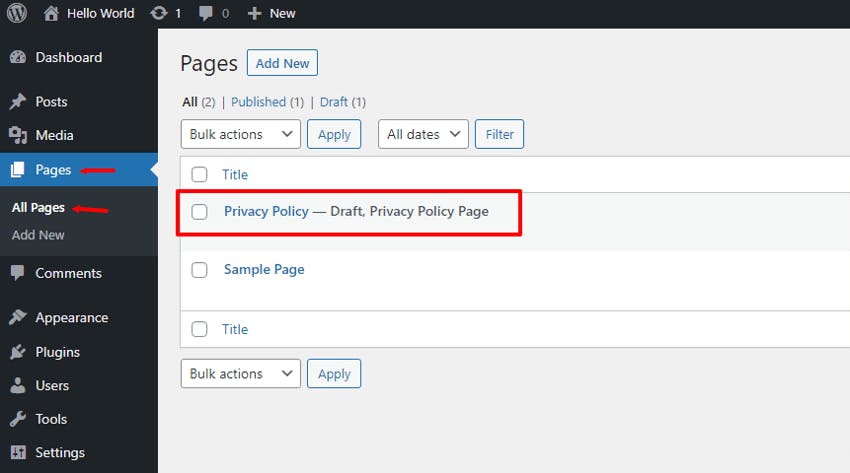
Navigate to Pages > All Pages.
If WordPress includes a privacy policy page, you'll find it there.
You might not find the Privacy Policy if you’re running an older version of WordPress. In that case, continue reading to figure out how to create one from scratch.
Creating a Privacy Policy In WordPress
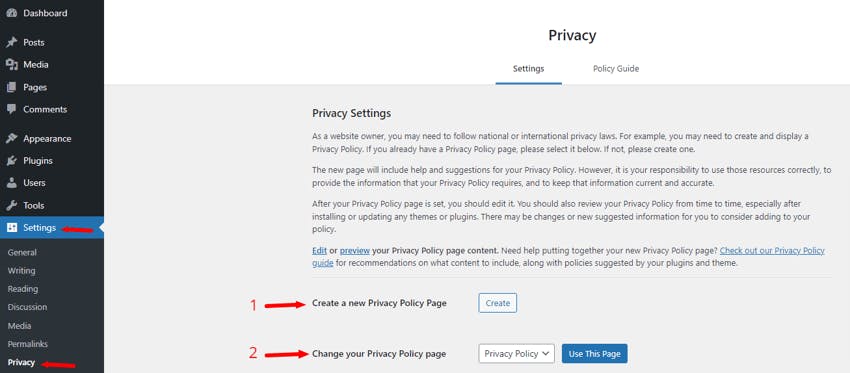
In the sidebar, navigate to Settings > Privacy. There you’ll find two separate options for creating the Privacy Policy page:
Generate a completely new page (No 1 in the below image).
Select an existing page and turn it into your privacy policy page (No 2 in the below image).
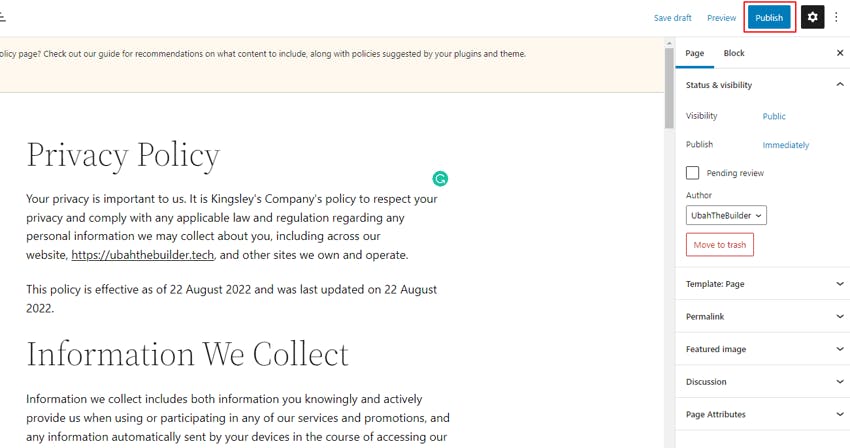
We’ll be creating a completely new privacy policy in this tutorial. To do this, click the create button. The WordPress block editor will appear and will contain a Privacy Policy outline that you can edit to suit your brand or business.
Tip: A privacy policy is a complex document to write. If you’re not sure of what to write, simply visit this website: GetTerms. The website allows you to generate a privacy policy for free and you can create one that is tailored to your business. Go for one of the paid plans if you intend to store different types of information such as cookies and emails.
After you’re done with writing and editing the page content, click the Publish button (on the top-right corner) to publish the page to your WordPress site. Alternatively, you can schedule it to be published at a later time or date, or even hide it from users by changing the Visibility to Private.
Updating the Permalink
It’s very common for your privacy policy page to have a URL with a random number (or ID) attached to it. Here's what I’m talking about: my-domain.com/privacy-policy-2.
This is how you might want the URL of your privacy policy page to be: my-domain.com/privacy-policy.
Here’s how to change the permalink:
Navigate to Settings > Permalinks in your WordPress dashboard.
Select Post name under Common Settings.
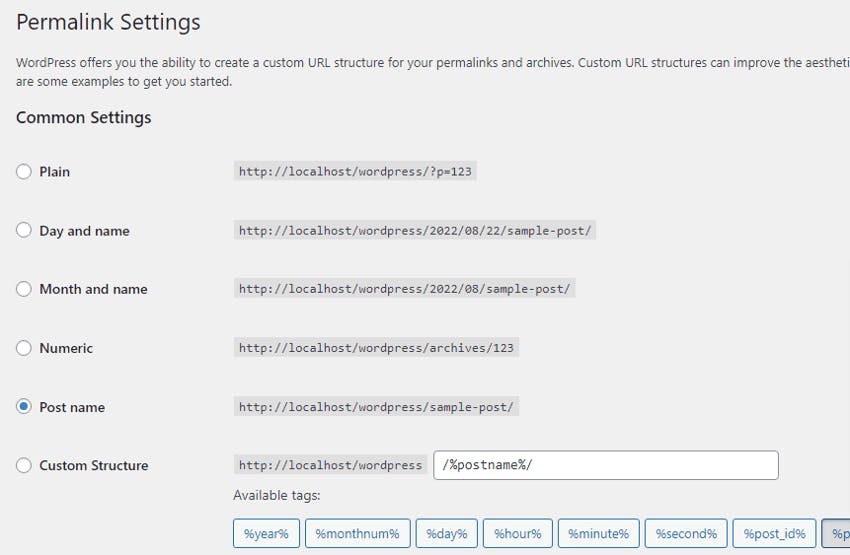
Scroll down and click the Save Changes button.
Navigate to Pages > All Pages
Find the Privacy Policy page you want to edit and click Quick Edit
Under QUICK EDIT, remove the numbers from the Slug (see image below).
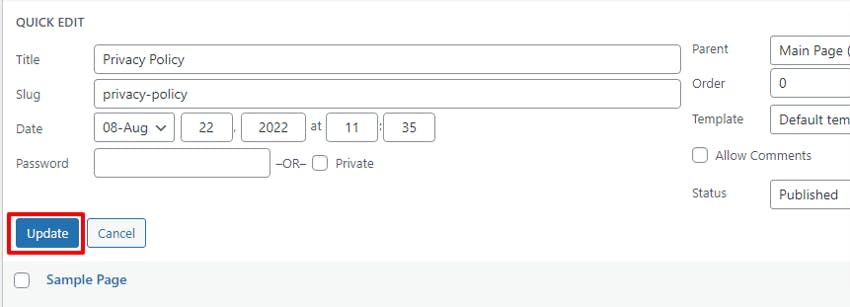
- Click Update to save the changes and remove the ID from the page's URL.
Conclusion
I hope you found this article on how to create a privacy policy page in WordPress helpful. Check out my other articles on WordPress here.